
Bathroom Renovation
How an Interior Designer Approaches a Bathroom Renovation: The Process from First Call to Final Walkthrough
Quick answer: A designer-led bathroom renovation runs in five phases: discovery and programming (what you need and what you want), concept design (tile, fixture, and layout direction), design development (detailed drawings and finish selections), procurement and contractor coordination (sourcing, ordering, scheduling), and installation oversight with a final punch list. The design phase typically takes four to eight weeks before demolition begins. The renovation itself takes three to six weeks for a standard primary bath.
Start Your Bathroom Renovation
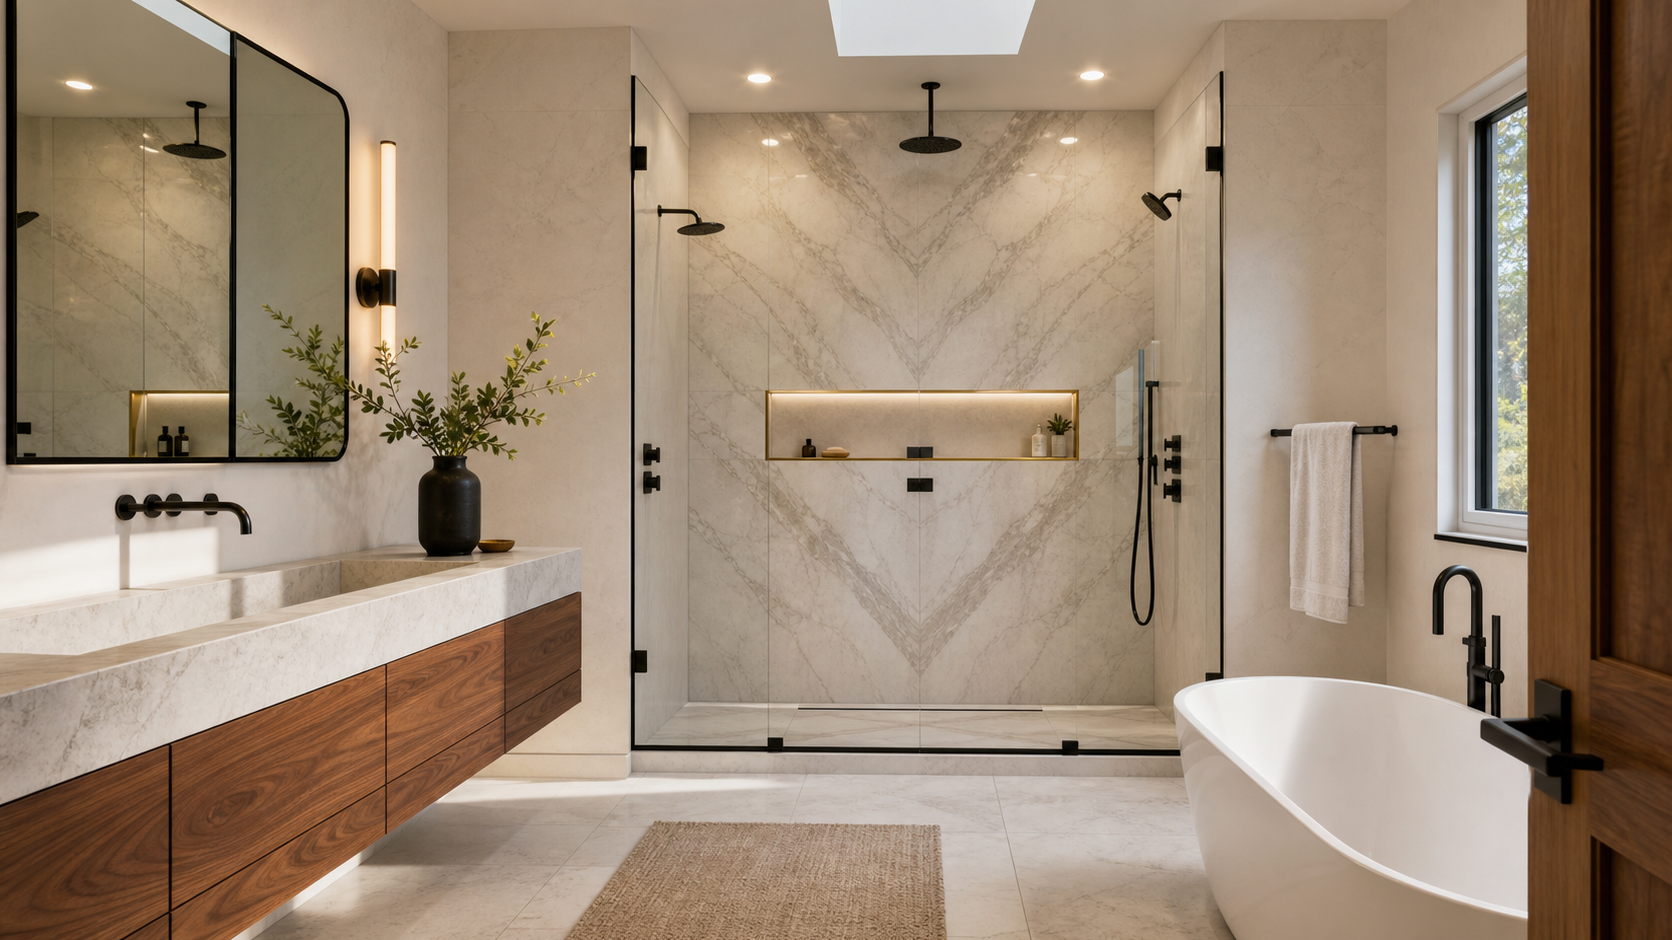
A bathroom renovation is one of the most technically complex interior projects a homeowner undertakes. Plumbing, electrical, tile, custom cabinetry, ventilation, waterproofing, and finish selection all intersect in a room that is frequently under a hundred square feet. When the coordination fails — when the tile arrives in the wrong size, the vanity is on backorder, or the contractor begins demo before the fixtures are confirmed — the project stalls and the costs compound.
At Shea Studio Interiors, a designer-led bathroom renovation is structured to eliminate exactly those failure points. Here is how the process works from the initial inquiry through the final walkthrough.
Phase 1: Discovery and Programming
The discovery meeting covers functional requirements (double vanity versus single, soaking tub versus walk-in shower, accessible design considerations), usage patterns (morning rush versus leisurely spa routine), storage needs, and budget parameters. For primary bathrooms, we also discuss any plumbing relocation that might be desirable and the tradeoffs in cost and timeline that come with moving supply and drain lines.
This phase produces a brief programming document that becomes the design directive. Every selection later in the project is evaluated against it: does this tile choice serve the needs identified in programming, or are we just chasing a trend?
Phase 2: Concept Design
We present a concept board that captures the aesthetic direction with images, material samples, and a preliminary layout. At this stage we are not specifying exact tiles or fixtures — we are agreeing on the design language. Warm matte stone with matte black fixtures and custom walnut millwork? Or crisp white ceramic, polished chrome, and painted cabinetry? The concept alignment prevents costly direction changes during design development.
For bathrooms with plumbing relocation or structural work, we engage a contractor at this stage for a rough feasibility assessment. Changes to drain lines, in particular, carry significant cost and timeline implications that should be understood before detailed design begins.
Phase 3: Design Development and Specification
| Deliverable | What it covers | Why it matters |
|---|---|---|
| Floor plan and elevations | Tile layout, fixture placement, millwork heights | Prevents field decisions that break the design |
| Tile schedule | Each tile type, size, pattern, grout color, and square footage | Allows accurate bidding and ordering with correct overage |
| Fixture schedule | Faucets, showerhead, tub, toilet, lighting SKUs | Eliminates substitutions during ordering |
| Vanity/millwork drawings | Cabinet dimensions, drawer configuration, finish | Required for custom cabinet shop to fabricate accurately |
| Electrical plan | Outlet locations, switch placement, lighting positions | Reviewed by contractor before rough-in to prevent rework |
The specification package is the document that goes to the contractor for bid and becomes the construction reference. A thorough specification prevents the “contractor’s choice” substitutions that are a frequent source of disappointment in renovation outcomes.
Phase 4: Procurement and Contractor Coordination
We manage the procurement of designer-specified items: tile, fixtures, lighting, mirrors, hardware, and accessories. Items with long lead times are ordered during design development, not after demo. This is one of the highest-value functions of a designer in a renovation: the ability to sequence material orders against the construction schedule to keep the project moving.
Contractor coordination at this stage includes reviewing the bid for completeness, confirming the scope of plumbing and electrical work, and establishing a communication protocol for on-site questions. We provide the contractor with the specification package and expect all substitution requests to come through us for approval before any changes are made.
Phase 5: Installation Oversight and Punch List
We conduct site visits at key milestones: rough-in completion (before walls close), tile installation (during, not after), millwork installation, and fixture installation. Each visit produces a note to the contractor with any corrections or confirmations. The final site visit is the punch list: a documented list of every item to be corrected or completed before sign-off and final payment.
The punch list is not a hostile document — it is standard professional practice that protects both the homeowner and the contractor by creating a clear definition of what “done” means.
Ready to Start Your Bathroom Renovation?
Shea Studio Interiors manages primary, guest, and powder room renovations throughout Fairfax, Fairfax Station, Great Falls, and Northern Virginia. Let us take the coordination off your plate.
Frequently Asked Questions
How long does a designer-led bathroom renovation take from start to finish?
For a standard primary bathroom (under 100 square feet, no plumbing relocation), expect four to eight weeks of design work before construction begins, followed by three to six weeks of construction. Total project duration from first meeting to move-back-in is typically three to five months. Projects involving plumbing relocation, custom millwork with long lead times, or structural changes run longer. We give a realistic schedule at the end of Phase 2 when the scope is confirmed.
What does an interior designer add to a bathroom renovation that a contractor cannot?
A designer provides the complete design package before construction begins: tile layout drawings, elevation drawings, a detailed specification, and procurement management for long-lead items. Without this, contractors make field decisions that may be structurally sound but aesthetically inconsistent with the design intent. A designer also manages the procurement timeline so materials arrive when needed, preventing the delays that happen when a contractor finishes demo and then discovers the tile is on a twelve-week lead.
When should tile be ordered relative to the construction start date?
Tile should be ordered eight to twelve weeks before it is needed on site. Some large-format or specialty tiles have even longer lead times. We confirm all tile quantities and place orders during or immediately after design development — before demolition begins. A tile shortage mid-installation, especially if the material is discontinued or on backorder, is one of the most common and most costly renovation delays we see in projects that did not have designer coordination.
What decisions need to be made before demolition starts?
All of them. Tile selection, fixture selection, lighting selection, vanity design, hardware finish, and electrical layout should all be decided and specified before demo begins. Changes after demo carries a cost multiplier: the contractor is mobilized, the schedule is running, and field modifications require rescheduling trades. The discipline of the design phase — making every decision in the planning stage, not in the field — is the primary source of renovation cost control.
How do you handle unexpected conditions discovered during demolition?
Unexpected conditions — mold, out-of-level floors, outdated plumbing that does not meet code — are common in Northern Virginia homes built before the 1990s. We include a contingency allowance in every project budget for this reason, typically ten to fifteen percent of the construction cost. When a condition is found, we document it with the contractor, determine the scope of the fix, and update the schedule and budget before the work proceeds. The homeowner is never surprised by a condition they were not told about.
Can an interior designer help with a bathroom renovation if I already have a contractor?
Yes, and this is a common arrangement. We can provide the full design package — concept, specifications, drawings, and procurement — for a contractor the homeowner has already selected. We establish our role as the design authority and ask that all substitution requests come through us. The contractor handles the construction; we handle the design coordination. It works well when the contractor is professional and understands the value of a documented specification.
What is a punch list and when does it happen?
A punch list is a documented inventory of every incomplete or incorrect item that must be addressed before the project is considered finished and final payment is released. It happens at the end of construction, after all trades have completed their work. Typical punch list items include grout that needs touch-up, a hardware piece installed at the wrong height, a light fixture that arrived with a scratch, or a caulk joint that was not finished cleanly. Punch lists are standard practice and protect both the homeowner and the contractor by defining “done” in writing.